
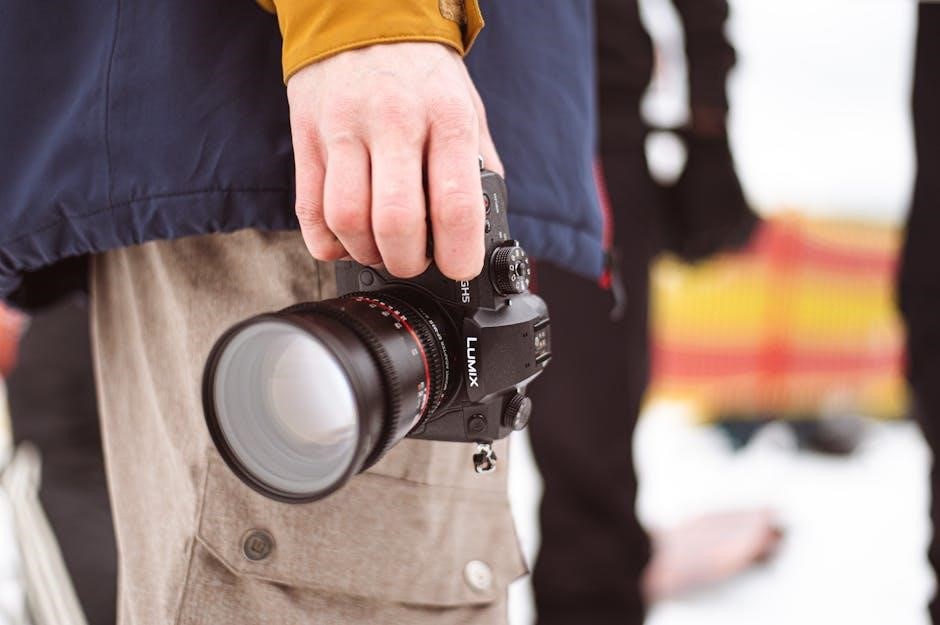
The Panasonic Lumix G7 is a versatile mirrorless camera featuring a 16MP Micro Four Thirds sensor, 4K video recording, and intuitive controls, ideal for photography enthusiasts seeking high-quality imaging and advanced functionality.
1.1 Overview of the Camera
The Panasonic Lumix G7 is a mirrorless interchangeable-lens camera featuring a 16.00-megapixel Micro Four Thirds Live MOS sensor and Venus Engine for excellent image quality. It supports 4K video recording, Depth From Defocus (DFD) autofocus, and ISO sensitivity up to 25600. Compact and lightweight, it offers a built-in OLED viewfinder, tiltable touchscreen LCD, and Wi-Fi connectivity. Designed for versatility, it appeals to photography enthusiasts and professionals seeking a balance between performance and portability for both stills and video capture.
1.2 Key Features and Benefits
The Lumix G7 offers 4K video recording, enabling precise autofocus with Depth From Defocus (DFD) technology. Its 16MP sensor delivers sharp images and excellent low-light performance up to ISO 25600. The camera features a compact, ergonomic design with a tiltable touchscreen and built-in OLED viewfinder for enhanced usability. Wi-Fi connectivity allows seamless image transfer and remote control. These features make the G7 an ideal choice for enthusiasts seeking a versatile, high-performance camera for both photography and video production.
Setting Up Your Lumix G7
Setting up the Lumix G7 involves unboxing, charging the battery, and installing the memory card. Mounting lenses and attaching basic accessories completes the initial setup process.
2.1 Unboxing and Initial Setup
Upon unboxing the Lumix G7, you’ll find the camera body, lens, battery, charger, and USB cable. Ensure all accessories are included and in good condition. Begin by charging the battery fully, which typically takes about 2-3 hours. While charging, familiarize yourself with the camera’s ports and controls. Once charged, insert the battery into the camera and install the memory card into the provided slot. Mount the lens securely, ensuring it clicks into place. Power on the camera and follow the on-screen prompts to set the language, date, and time. This initial setup prepares your Lumix G7 for first use, allowing you to explore its features and settings.
2.2 Charging the Battery and Memory Card Installation
Charge the Lumix G7 battery using the provided charger. Plug the charger into a power outlet and allow 2-3 hours for a full charge. The camera cannot be used while charging. Once charged, insert the battery into the camera’s battery compartment, ensuring it clicks securely into place. For memory card installation, locate the card slot on the camera’s side or bottom, depending on the model. Insert the card with the label facing up and gently push until it clicks. Format the memory card in the camera menu for optimal performance before use.
2.3 Mounting Lenses and Basic Accessories
To mount a lens on the Lumix G7, align the lens mount with the camera’s Micro Four Thirds mount. Gently rotate the lens clockwise until it clicks into place. Ensure the lens is securely attached to prevent damage. For basic accessories, attach the shoulder strap to the camera’s strap eyelets for easy carrying. The lens cap should be placed on the lens when not in use to protect it from dust and scratches. Optional accessories like flashes or viewfinders can be attached using the camera’s hot shoe or accessory ports for enhanced functionality.

Basic Camera Operation
The Lumix G7 offers intuitive basic operation with a mode dial for selecting shooting modes and a touchscreen interface for easy menu navigation and quick access to essential controls.
3.1 Understanding the Mode Dial and Shooting Modes
The Lumix G7’s mode dial provides quick access to various shooting modes, including Manual (M), Aperture Priority (A), Shutter Priority (S), and Program (P). These modes allow users to control settings like aperture, shutter speed, and ISO. The camera also features intelligent Auto mode for beginners and Creative Control for artistic effects. Understanding these modes enhances shooting flexibility, enabling photographers to capture images with precision and creativity. Proper use of the mode dial is essential for optimizing the camera’s performance in different situations.
3.2 Navigating the Menu System
The Lumix G7 features a comprehensive menu system organized into tabs such as Camera, Video, and Custom. Each tab contains settings for image quality, autofocus, and exposure. Users can navigate using the touchscreen or physical controls like the D-pad and rear dial. The Q.Menu provides quick access to frequently used settings, while the My Menu tab allows customization by registering often-used options. This intuitive design ensures efficient navigation, enabling photographers to adjust settings swiftly and focus on capturing their shots effectively.
3.3 Using the Touch Screen and Key Controls
The Lumix G7’s touchscreen allows for intuitive operation, enabling tap-to-focus, menu navigation, and quick access to settings. Key controls like the D-pad and rear dial provide tactile adjustments for aperture, shutter speed, and ISO. The Fn buttons can be customized to assign frequently used functions, enhancing workflow efficiency. The Q.Menu offers rapid access to essential settings, streamlining the shooting process. This combination of touch and physical controls ensures a seamless and user-friendly experience, catering to both beginners and advanced photographers.

Advanced Features of the Lumix G7
The Lumix G7 offers advanced imaging capabilities, including 4K Ultra HD video recording, manual focus control, and a high ISO range up to 25600 for low-light shooting.
4.1 4K Video Recording and Photo Modes
The Lumix G7 excels in 4K Ultra HD video recording, capturing stunning detail at 30fps. It also features 4K Photo modes, allowing users to extract 8MP images from video footage. This mode is ideal for capturing fleeting moments with precision. Additionally, the camera supports various photo modes, including burst shooting and time-lapse, enhancing creativity and flexibility for both stills and video content creation. These features make the G7 a powerful tool for multimedia enthusiasts seeking high-quality output.
4.2 Using Manual Focus and Custom Settings
The Lumix G7 offers precise manual focus control, enhanced by the Depth From Defocus (DFD) technology for faster and accurate focusing. Users can customize settings to suit their preferences, such as assigning frequently used functions to the camera’s buttons. This personalization allows for a tailored shooting experience, making it easier to access key features during photography or video recording. The camera’s manual mode also enables full control over aperture, shutter speed, and ISO, providing creative freedom for advanced photographers.
4.3 Exploring ISO, Aperture, and Shutter Priority
The Lumix G7 allows users to explore ISO, aperture, and shutter priority for creative control. ISO ranges from 160 to 25600, enabling low-light photography. Aperture control adjusts depth of field, while shutter priority manages motion effects. These settings can be fine-tuned manually or via the camera’s intuitive interface, ensuring optimal results. Understanding these elements helps photographers balance exposure, achieve desired effects, and enhance image quality, making the G7 a powerful tool for creative expression and professional-level photography.

Customizing Your Lumix G7
Customize your Lumix G7 by assigning functions to buttons, adjusting image quality, and setting up wireless connectivity for enhanced personalization and streamlined workflows.
5.1 Assigning Custom Buttons and Functions
The Lumix G7 allows customization of its buttons and functions to suit your shooting style. You can assign frequently used settings like ISO, white balance, or autofocus modes to specific buttons for quick access. This feature streamlines your workflow and enhances efficiency during photography sessions. By personalizing the controls, you can tailor the camera to your preferences, ensuring intuitive operation and minimizing the need to navigate through menus. This level of customization makes the G7 adaptable to various shooting scenarios, catering to both beginners and advanced photographers.
5.2 Adjusting Image Quality and White Balance
The Lumix G7 allows you to fine-tune image quality by adjusting settings like file format (JPEG or RAW), compression, and noise reduction. You can also customize sharpness, contrast, and saturation to match your creative vision. White balance options include presets for common lighting conditions, such as daylight, cloudy, and fluorescent, as well as a manual adjustment feature. This ensures accurate color representation in various environments. Additionally, the camera supports white balance fine-tuning and bracketing, giving you enhanced control over your photos’ color accuracy and overall aesthetic. These adjustments empower photographers to achieve consistent and professional results.
5.3 Setting Up Wireless Connectivity
The Lumix G7 supports wireless connectivity through Wi-Fi, enabling seamless image transfer and remote camera control. To set up, install the Panasonic Image App on your smartphone or tablet. Connect to the camera’s Wi-Fi network using the SSID and password displayed on the camera’s screen. Once connected, you can transfer photos, adjust settings, and even trigger the shutter remotely; The app also allows for geotagging and sharing images directly to social media, enhancing your workflow and creativity on the go.

Troubleshooting Common Issues
Address battery drain by updating firmware and avoiding excessive screen use. For autofocus issues, clean the lens or reset camera settings. Connectivity problems can often be resolved by restarting the camera and ensuring stable Wi-Fi connections. Regularly update software and refer to the manual for detailed troubleshooting guides to maintain optimal performance and resolve common glitches effectively.
6.1 Resolving Battery and Charging Problems
Ensure the battery is fully charged using the provided charger. If the battery life is short, check for firmware updates, as they often improve power management. Avoid overcharging, as it can degrade battery health. Clean the battery contacts with a soft cloth to maintain proper connections. If issues persist, reset the camera to factory settings or replace the battery. Always use genuine Panasonic accessories to prevent compatibility problems. Regularly updating the camera’s firmware can also resolve unexpected power-related issues. Refer to the manual for detailed troubleshooting steps.
6.2 Addressing Autofocus and Image Quality Concerns
If the autofocus is slow or inaccurate, ensure the lens is clean and free of smudges. Resetting the camera to factory settings can resolve software-related autofocus issues; For image quality concerns, check that the lens is properly mounted and not damaged. Clean the sensor using a soft brush or blower to remove dust. Ensure the latest firmware is installed, as updates often improve autofocus and image processing. Using the correct autofocus mode (AF-S for stationary subjects, AF-C for moving ones) can enhance performance. If issues persist, consult the manual or contact support.
6.3 Fixing Connectivity and Software Glitches
To resolve connectivity issues, ensure the camera’s firmware is up to date, as outdated software can cause compatibility problems. Reset the camera by removing the battery and memory card for 30 seconds. For wireless connectivity, restart both the camera and the Panasonic Image App, ensuring a stable internet connection. If issues persist, reinstall the app and reset network settings. Perform a factory reset if glitches remain, but first back up your custom settings. Consult the manual or contact support for further assistance.

Maintenance and Care
Regularly clean the camera and lens to prevent dust and moisture damage. Update firmware for optimal performance and store the camera in a dry, cool environment to ensure longevity and functionality.
7.1 Cleaning the Camera and Lens
Regular cleaning is essential to maintain the performance of your Panasonic Lumix G7; Use a soft, dry microfiber cloth to gently wipe the camera body and lens surfaces. For stubborn smudges or fingerprints, lightly dampen the cloth with distilled water, but ensure it is not soaking wet. Avoid using chemical cleaners or abrasive materials, as they may damage the coatings. Clean the lens in a circular motion, starting from the center and moving outward. Always store the lens with a protective filter or cap to prevent dust and scratches. Regular maintenance ensures optimal image quality and longevity of your equipment.
7.2 Updating Firmware and Software
Keeping your Panasonic Lumix G7 up-to-date ensures optimal performance and security. Regularly check for firmware updates on the official Panasonic website. Download the latest version and follow the on-screen instructions to install it using a memory card. Ensure the camera battery is fully charged before starting the update process. Avoid interrupting the update, as this could damage the camera. Updated firmware enhances features, fixes bugs, and improves compatibility with lenses and accessories; Always use Panasonic’s official software for updates to maintain reliability and functionality.
7.3 Storing and Transporting the Camera
Proper storage and transportation are essential to maintain the Lumix G7’s condition. Store the camera in a cool, dry place, away from direct sunlight and moisture. Use a protective case or bag to prevent scratches and dust exposure. Avoid extreme temperatures and ensure the lens is capped when not in use. When transporting, secure the camera to prevent accidental drops or impacts. Always handle the camera with care to preserve its functionality and extend its lifespan. Regular inspections before and after storage or travel are recommended.
The Panasonic Lumix G7 offers exceptional image quality, versatility, and advanced features, making it a powerful tool for photographers. Explore its capabilities to unlock full creative potential.
8.1 Final Tips for Maximizing Camera Performance
To get the most out of your Panasonic Lumix G7, experiment with manual mode for precise control over aperture, shutter, and ISO. Regularly clean the lens and sensor to maintain image clarity. Update firmware to access the latest features and improvements. Familiarize yourself with custom buttons to streamline your workflow. Shoot in RAW format for better post-processing flexibility. Explore 4K photo modes for capturing dynamic moments. Finally, practice using advanced autofocus settings and white balance adjustments to enhance your photography skills.
8.2 Encouragement to Explore Further Learning
Take your photography to the next level by exploring the Panasonic Lumix G7’s advanced features through video tutorials and user guides. Experiment with manual modes and creative settings to unlock your full artistic potential. Stay updated with firmware improvements to ensure optimal performance. Engage with online communities and forums for tips and inspiration from experienced users. Practice regularly and review your work to refine your skills. Dive into the world of photography with confidence, knowing the G7 is a powerful tool to express your vision.